
Introduction
TNZ's Online Dashboard provides users with a simple point-and-click tool to send faxes.
Don't have dashboard access? You can add a dashboard user using your account administrator's login or contact your TNZ representative.
Send Fax
Once logged into the TNZ Dashboard, select New Message then Send Fax from the menu.

Upload your fax documents
Upload the documents to be sent. Document file types may be PDF, DOCX, etc.
For a full list of supported file types, see: Document Types Supported for Faxing
Select Contacts
Input the fax numbers that will receive your message:
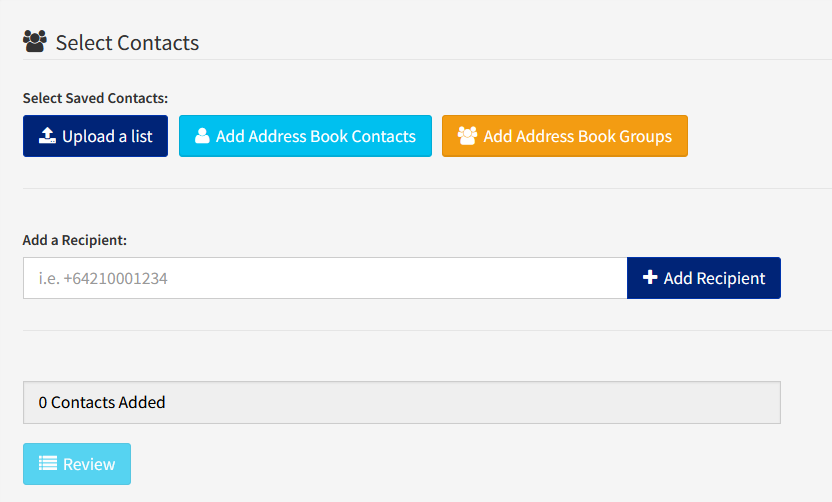
> Upload a List allows you to import contacts from a spreadsheet list file (CSV, XLS or XSLX). See the Creating a Contact List Spreadsheet guide.
> Add Address Book Contacts allows you to select individual contact names and fax numbers from your TNZ Dashboard Address Book. See the Adding Address Book Contacts video guide.
> Add Address Book Groups allows you to quick-select Address Book Groups.
> Add a Recipient allows you to add individual numbers. This Recipient will receive this message, however, they will not be saved to your Address Book.
Settings
> Reference identifies the calls for billing and reporting purposes
> Resolution sets how clear the fax will be (higher clarity takes longer to send)
> Pacing Value sets the maximum number of concurrent calls, which is useful when keypad options can redirect calls back to your office or call-centre (Tip: Set the Pacing Value to be the number of staff members available to answer routed calls)
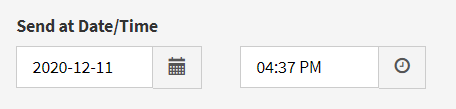
> Send at Date/Time delays sending of the calls until the set Date/Time (useful for reaching recipients at a relevant time)
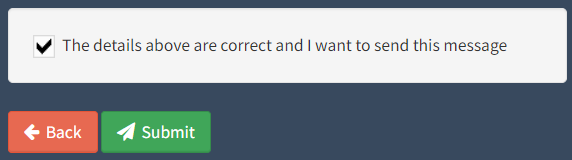
Review and Send
One final check of the details, then click Submit!
Reports & Tracking
You can track message delivery under the View Messages menu:
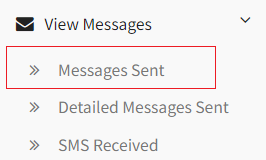
> Messages Sent displays a list of messages sent (displayed by Group/broadcast).
> Detailed Messages Sent displays a list of all messages (displayed by Contact).
Tips:
- You can use the ‘Date range’ select to view messages sent in the past.
- The ‘Search’ bar allows filtering on any data present in the table. You cannot search by message content. Instead, you must search by a visible field, for example ‘Reference’.
- Results can be exported to a spreadsheet by clicking the red ‘Export List’ button.
- You can click on an entry to view more information.
Understanding Results:
> Status displays the call’s overall state – Success or Failed.
> Result displays the detailed result. For example, ‘Sent Ok’ is a successful result, and ‘Busy’ is a failed result. For a full list of Result Codes and explanations, see Fax Delivery Result Codes.