
Introduction
TNZ's Online Dashboard provides users with a simple point-and-click tool to send Voice Broadcasts.
Don't have dashboard access? You can add a dashboard user using your account administrator's login or contact your TNZ representative.
The "Send VoiceCast" and "Send Text-To-Speech" options
Send VoiceCast
This feature allows you to send Voice calls using WAV and MP3 voice recordings for a more personal touch.
Send Text-to-Speech
This feature converts your text into naturally sounding synthetic voice.
It supports personalisation, so you can insert names, dates, account numbers, etc.
This also supports a range of languages and accents, including te reo Māori.
This option is sometimes abbreviated to "TTS".
Send VoiceCast (With Template) / Send Text-to-Speech (With Template) and Manage Template(s)
These options allows you to set up pre-saved templates to make loading of messages simpler.

Insert Your Voice Message
When using Send VoiceCast, you may upload WAV or MP3 files.
When using Send Text-to-Speech, you may insert the text to be spoken as voice. This may include personalisations such as First Names and other custom values (pulled from the Address Book or your imported contact list), as well as speech mark-up to improve the pronunciation of words and phrases.

Set up Keypad options
An optional feature is allowing a call recipient to press a keypad button (DTMF) to have their call connected to you.

> Replay 'Message to People' restarts the call (plays the main section again)
> Play 'Message to Answer Phones' plays the Message to Answer Phones section (regardless of whether the call is answered by a Human or Answering Machine)
> Play 'Message on Wrong Keypad' plays the Wrong Keypad section. This is the default behaviour for 'No Action' but can be explicitly configured if you have changed the Wrong Keypad options previously.
> Play 'Message on Call Completion' plays the Call Completion (End) section. This is useful for capturing a recipient's confirmation. For example, your main message might say "Press 2 to confirm the call", and your Keypad #2 points to "Play 'Message on Call Completion'" and your Call Completion message might say "Great, thank you for confirming. Good bye."
> Forward Call diverts the call to another telephone number. You can then set up the 'Play Message on Forwarded Call' options.
> Require Keypad Button Press sets a rule that if the call is answered by a human, they must press a valid mapped keypad button to mark the call a Success.

Enable Answer Phone Detection
The system can detect whether the call is answered by a Human or an Answer Phone.
If an Answer Phone answers the call, different actions can occur:
1. A customized message can be played, such as "Sorry we missed you..."
2. The call can be automatically retried (especially useful for emergency alert calls where it is essential to reach the recipient).

For a full guide to Answer Phone Detection, including an explanation of the Answer Phone Mode options, see Answer Phone Detection for Voice.
Select Contacts
Select the Contacts that will receive your message:
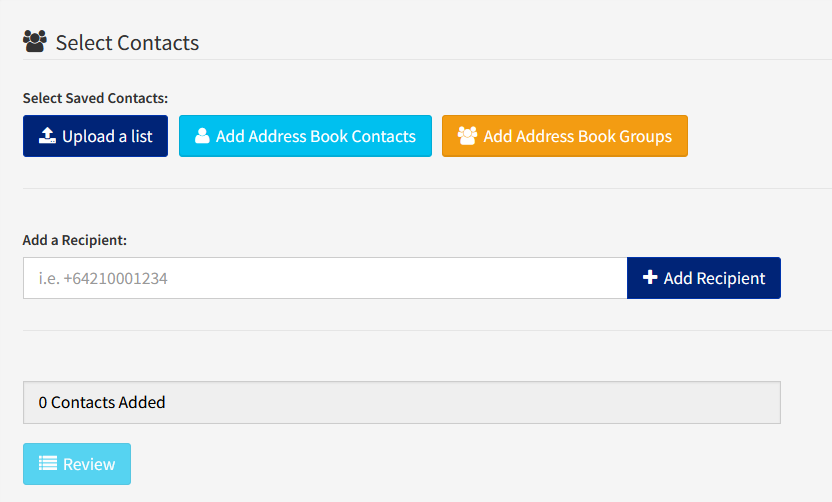
> Upload a List allows you to import contacts from a spreadsheet list file (CSV, XLS or XSLX). See the Creating a Contact List Spreadsheet guide.
> Add Address Book Contacts allows you to select individual contact names and numbers from your TNZ Dashboard Address Book. See the Adding Address Book Contacts video guide.
> Add Address Book Groups allows you to quick-select Address Book Groups.
> Add a Recipient allows you to add individual numbers. This Recipient will receive this message, however, they will not be saved to your Address Book. Personalisation will not work (for example, %ATTENTION% will be replaced with silence).
Advanced Options
There are a number of advanced options available:
> Reference identifies the calls for billing and reporting purposes
> Billing Account allocates the call to a specific SubAccount for billing and reporting purposes
> Pacing Value sets the maximum number of concurrent calls, which is useful when keypad options can redirect calls back to your office or call-centre (Tip: Set the Pacing Value to be the number of staff members available to answer routed calls)
> Max Duration (Main Call) sets a time limit on how long the call can last (in seconds). The system will automatically calculate an appropriate limit (3x the length of your voice message), however, you can override this here.
> Max Duration (Forwarded/Connected Call) when a call recipient presses a keypad option and the call routes to an office or call-centre, this is the time limit on how long the forwarded (connected/bridged) call can last in seconds. in the sample screenshot, we have used "7200" seconds which equals two hours. The default value is 10800 (three hours).
> Retry Attempts sets how many times the system should automatically retry failed calls
> Retry Periods sets how many minutes the system should wait between retry attempts
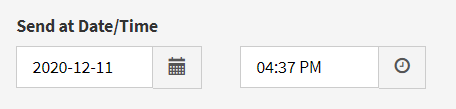
> Send at Date/Time delays sending of the calls until the set Date/Time (useful for reaching recipients at a relevant time)
> End at Date/Time ends all pending calls at the set Date/Time (when sending very large voice broadcasts, this option is useful for ending calls if they become obsolete or the time-of-day is inappropriate, such as late at night)
> Send Time Window sets the hours of the day that calls are allowed to proceed (when sending very large voice broadcasts, this option is useful for ceasing calls at, say, 8pm, then resuming calling again at 8am)

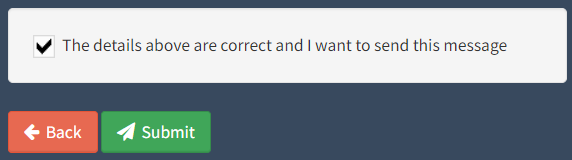
Review and Send
One final check of the details, then click Submit!
Reports & Tracking
You can track message delivery under the View Messages menu:
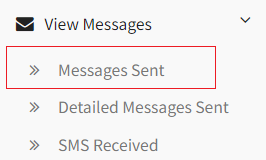
> Messages Sent displays a list of messages sent (displayed by Group/broadcast).
> Detailed Messages Sent displays a list of all messages (displayed by Contact).
Tips:
- You can use the ‘Date range’ select to view messages sent in the past.
- The ‘Search’ bar allows filtering on any data present in the table. You cannot search by message content. Instead, you must search by a visible field, for example ‘Reference’.
- Results can be exported to a spreadsheet by clicking the red ‘Export List’ button.
- You can click on an entry to view more information.
Understanding Results:
> Status displays the call’s overall state – Success or Failed.
> Result displays the detailed call result. For example, ‘Sent Ok’ is a successful result, and ‘Busy’ is a failed result. For a full list of Result Codes and explanations, see Voice/TTS Delivery Result Codes.
> Seconds displays the call’s duration in seconds. For example, if the Seconds is short (less than 10 seconds), the recipient likely answered and hung up immediately without listening to the call.
> Prompts displays the call’s progress. Some examples to help with interpretation:
- ‘Main’ means the recipient answered the call, listened for the ‘Seconds’ time, then hung up the call without pressing a keypad button.
- ‘Main=2,End’ means the recipient listened to the main message, then pressed 2 (the ‘Confirm’ button) and listened to the End message.
- ‘Main=1,Main=1,Main=2,End’ means the recipient answered the call, then pressed 1 (replaying the main message), then pressed 1 again (replaying the main message again), then pressed 2 (the ‘Confirm’ button) and listened to the End message.
- ‘Main=6,Wrongkey=2,End’ means the recipient answered the call, then pressed 6 (an invalid key), listened to the Wrongkey message (a message stating “That’s an invalid entry” then re-reads the main message), then pressed 2 (the ‘Confirm’ button), and listened to the End message.

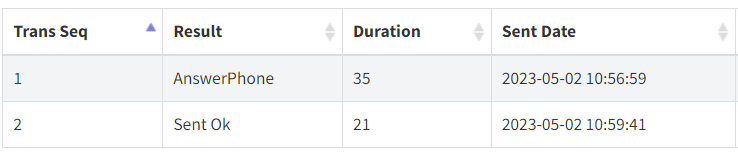
You can click on a Contact, then click the Open Detail Page button to view specific call attempt information:
Tips:
-
Transmissions displays each attempt individually. If the first attempt failed, each subsequent attempt will be logged.
-
Remote ID displays the number being dialled. For example, if the Contact has a "Main Phone" entry and an "Alt Phone 1" entry, you will see the "Remote ID" change appropriately on re-attempts.