Using the TNZ Dashboard, you can create new calendars or sync your Microsoft and Google calendars.
You can then automatically send appointment reminders and track appointment confirmations, using SMS, Voice and Email.
Calendar Types
TNZ Calendar
You can create a TNZ Calendar in the dashboard. This is TNZ specific and you must use the TNZ Dashboard to update calendar events.
To create a new TNZ Calendar:
- Log into the TNZ Dashboard
- Select 'Calendar' from the menu
- Select '+ Add Calendar'
- Select 'TNZ Calendar'
- Configure appropriately (see 'Configure My Calendar' below). You may optionally import an ICS or iCal file of events exported from another application.
Microsoft Outlook / Microsoft 365 Calendars
You can sync your existing Microsoft 365 calendar with the TNZ Dashboard.
This means you can edit your calendar events in both the TNZ Dashboard and Outlook/365 and the changes will be synchronised in real-time.
Cloud-hosted calendars are supported only. We currently do not support automatically syncing local Outlook desktop calendars (ICS/VCS).
To sync your Outlook Calendar:
- Log into the TNZ Dashboard
- Select 'Calendar' from the menu
- Select '+ Add Calendar'
- Select 'Outlook Calendar'
- Log into your Outlook account and select the appropriate calendar.
- If you wish to add multiple calendars, you will need to repeat these steps per calendar.
- If your preferred calendar is not displayed, check your access and sharing permissions in the Microsoft 365 Admin Center (you may not have rights to sync the calendar).
- Configure appropriately (see 'Configure My Calendar' below).
Google / Gmail Calendars
You can sync your existing Google or Gmail calendar with the TNZ Dashboard.
This means you can edit your calendar events in both the TNZ Dashboard and Google Calendar and the changes will be synchronised in real-time.
To sync your Google Calendar:
- Log into the TNZ Dashboard
- Select 'Calendar' from the menu
- Select '+ Add Calendar'
- Select 'Google Calendar'
- Log into your Google account and select the appropriate calendar. If you wish to add multiple calendars, you will need to repeat these steps per calendar.
- Configure appropriately (see 'Configure My Calendar' below).
Configure My Calendar
When setting up your calendar for the first time or editing your calendar's settings, default reminder options can be configured.
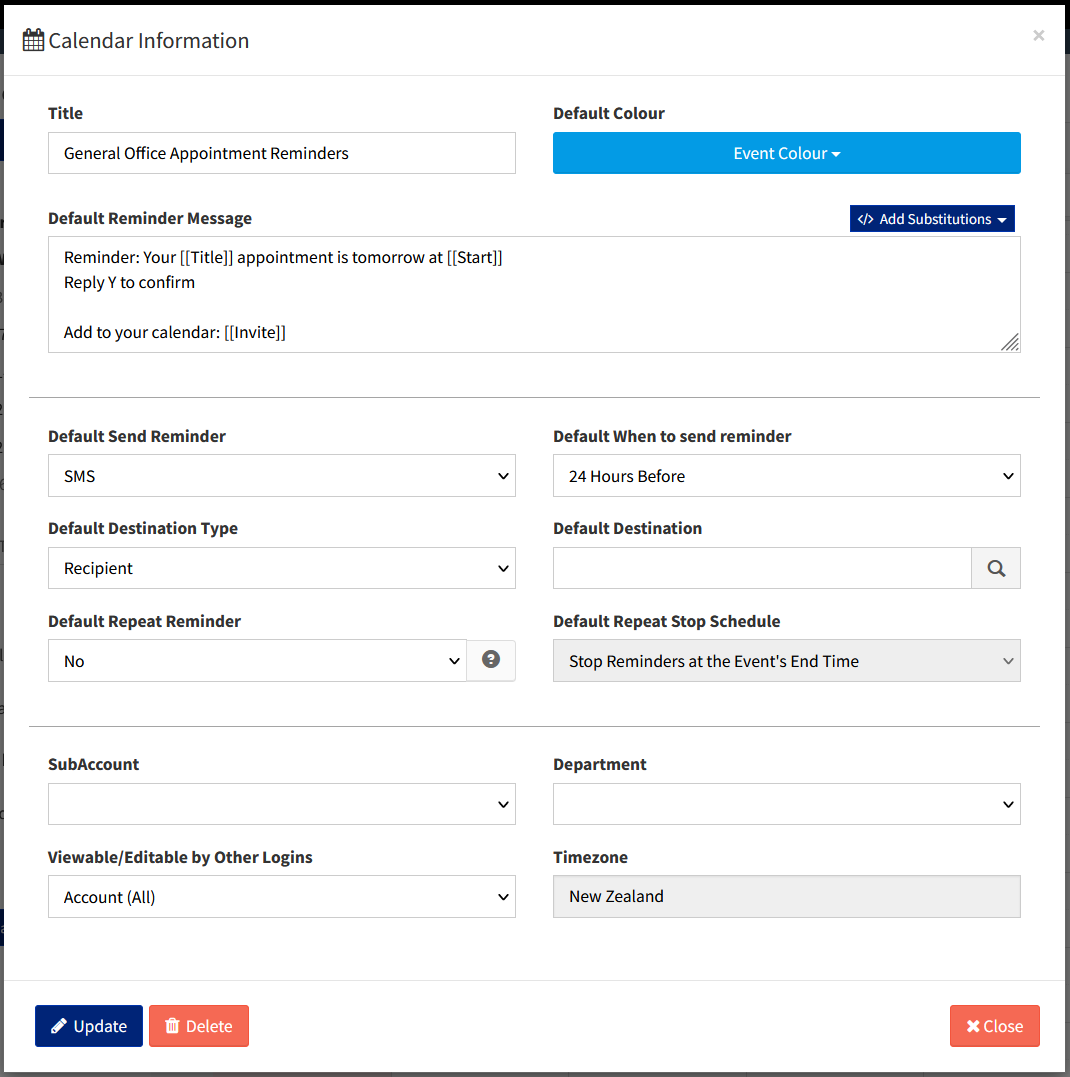
Fields:
- Title: The name of your calendar
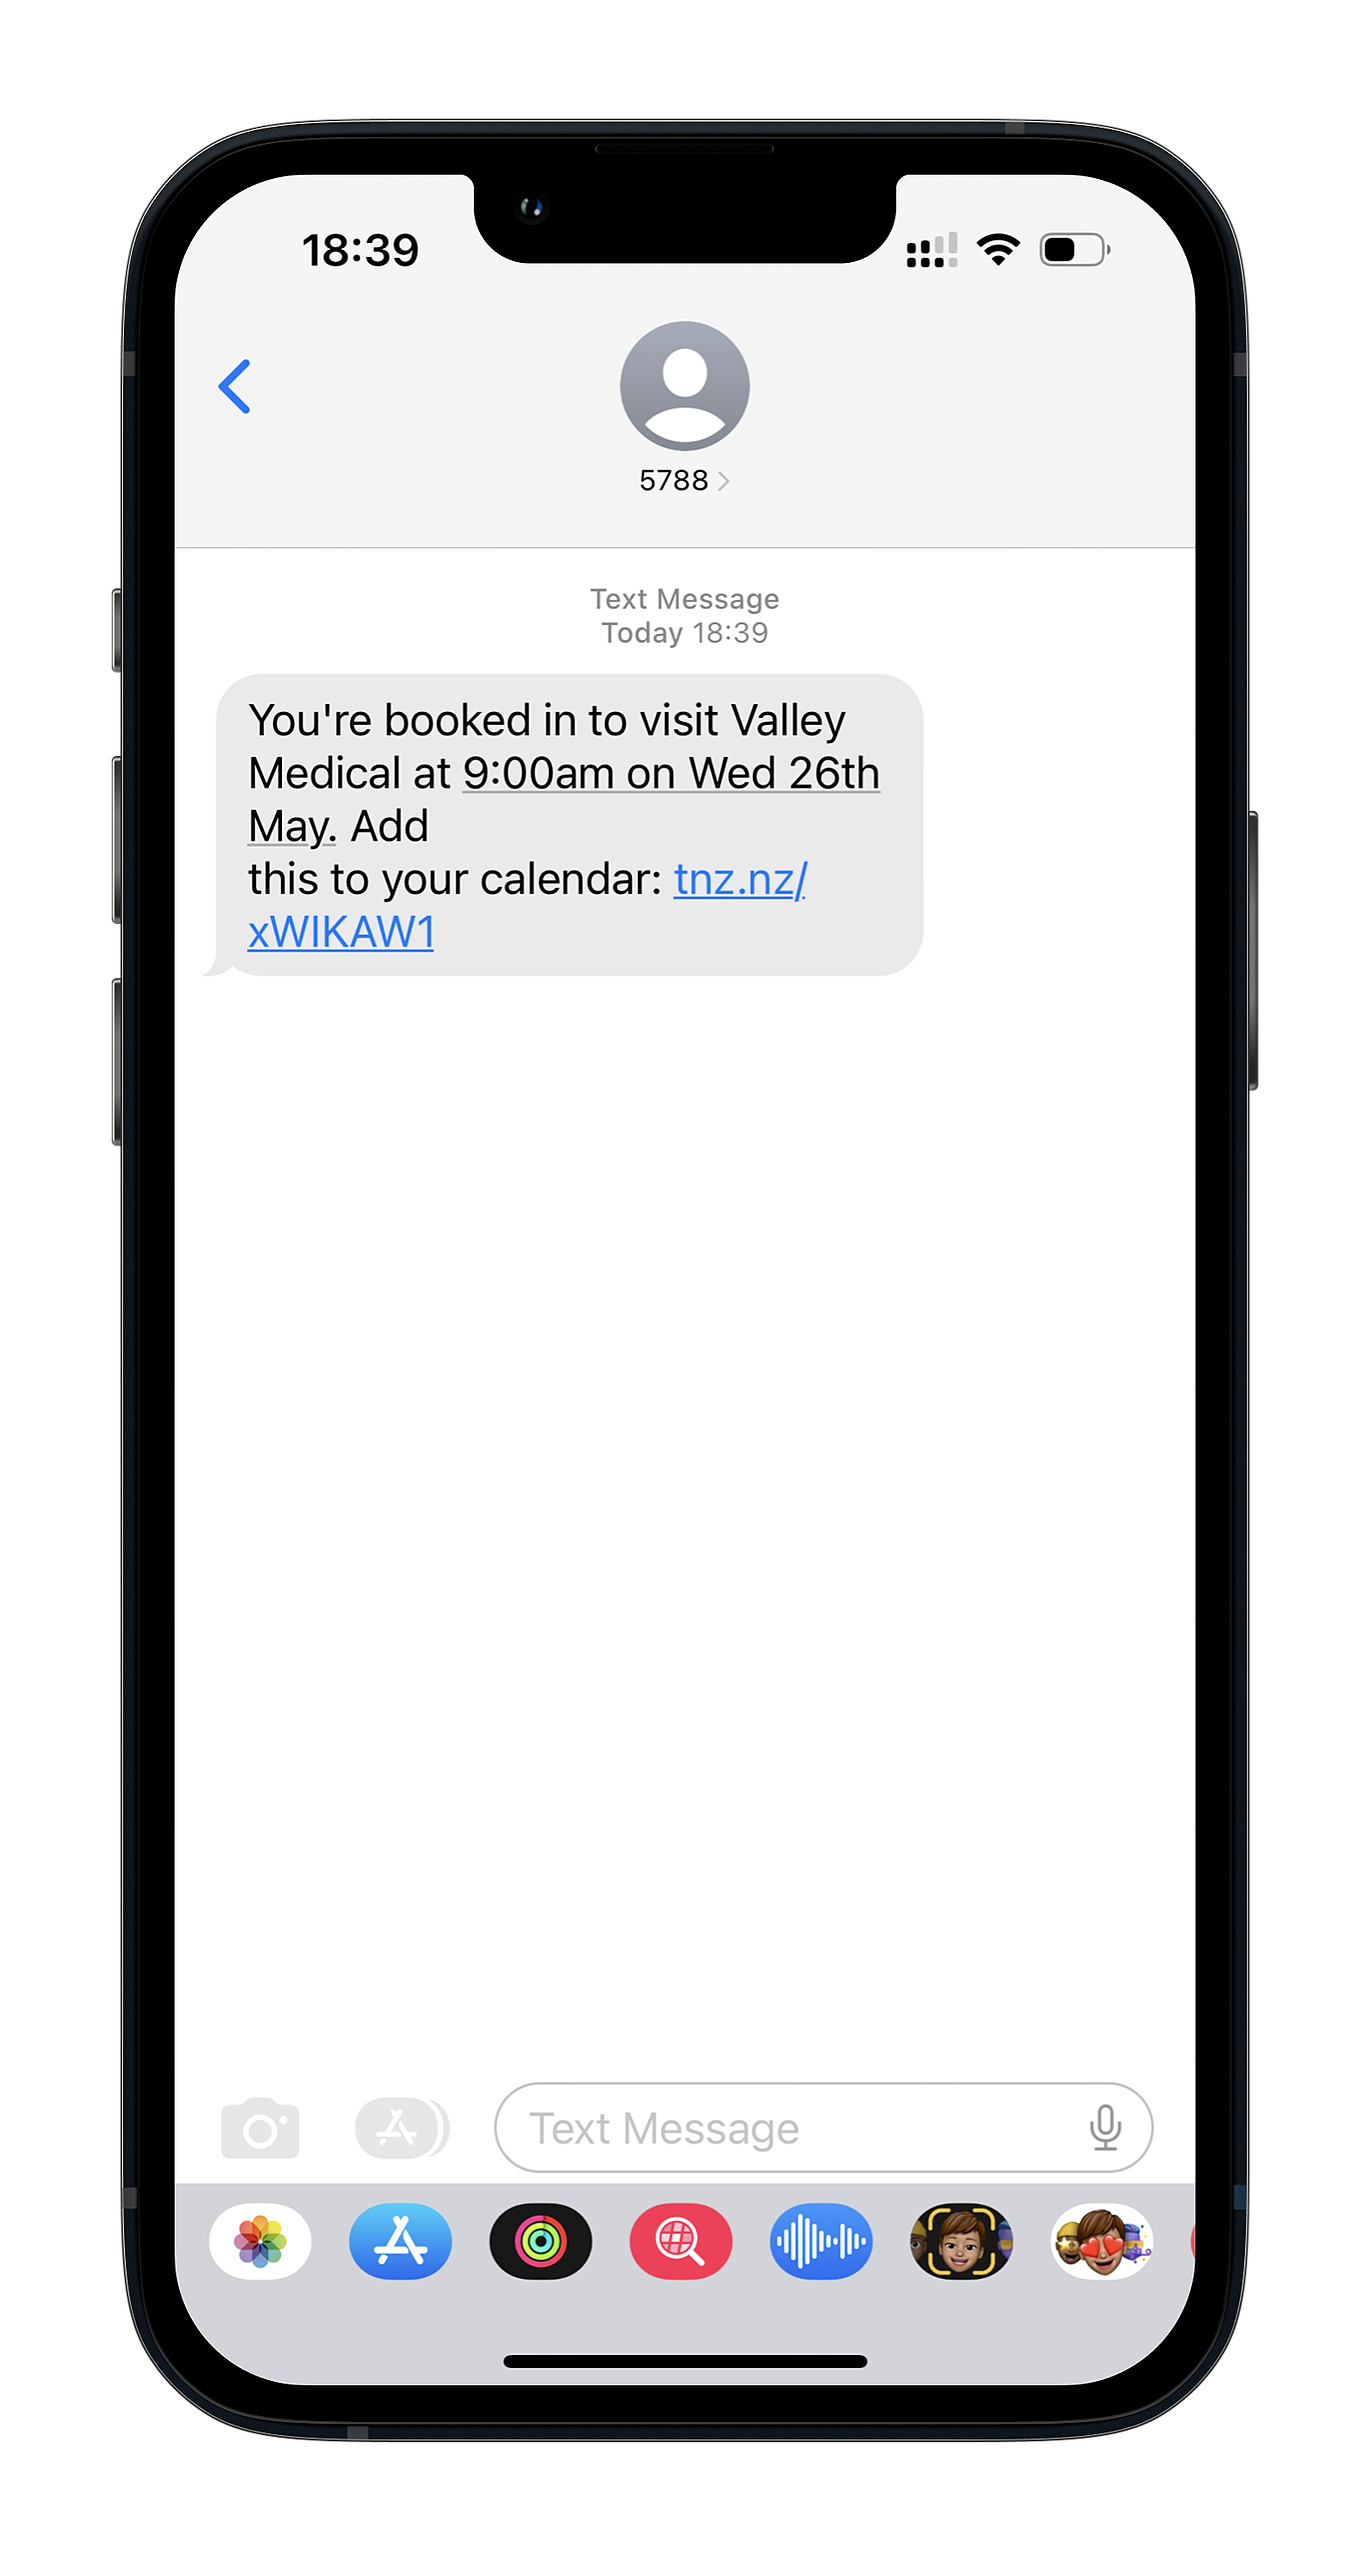
- Default Reminder Message: The reminder message to send by default - this can be manually edited per calendar event or overridden and can include custom mail-merge Substitutions such as [[Title]], [[Location]] and [[Start]] time, which is extracted from the calendar event. The [[Invite]] command adds a link to an ics/ical file that adds the event to the device's calendar.
- Default Send Reminder: The type of reminder to send (SMS, Voice, Email).
- Default When to send reminder: How long before the event's Start time to send the reminder ('On Time', '0 Minutes', '30 Minutes', '1 Hour', '2 Hours', '3 Hours', '6 Hours', '12 Hours', ' 24 Hours', '1 Day', '2 Days', '1 Week', '1 Month').
- Default Destination Type: Whether to send the reminder to an individual contact or an entire group (in most cases, leave this blank).
- Default Destination: Default contact or group to send the reminder to (allows you to send the reminder to a contact or group if not overridden in the event, e.g. the event organiser).
- Default Repeat Reminder: Whether the reminder should automatically repeat (Daily, Weekly, etc).
- Default Repeat Stop Schedule: When the repeating reminder should stop.
- SubAccount: The TNZ SubAccount the calendar should apply to (for viewing rights and cost allocation).
- Department: The TNZ Department the calendar should apply to (for viewing rights and cost allocation).
- Viewable/Editable by Other Logins: Whether other users in your account should be able to view and edit the calendar settings and events.
- Timezone: The calendar's default Timezone.
Overriding Calendar Defaults
You can override the default reminder settings for each event.
Using the TNZ Dashboard:
If editing an event in the TNZ Dashboard (this applies to TNZ Calendar as well as Microsoft and Google Calendars), click on the event to edit the reminder settings:

Using the Microsoft 365 or Google Calendar editor:
If editing an event in Outlook or Google Calendar, you can specify the override commands in the event's 'Notes' field.
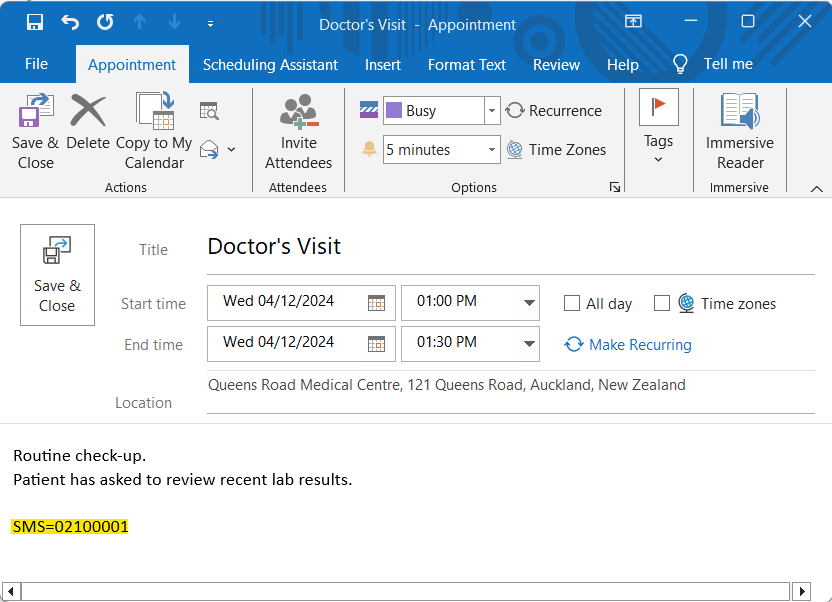
Basic options for setting the reminder Type and Destination:
SMS=021000001
Email=demo@example.com
Voice=09 555 4444
Advanced options:
[[Reminder]]
Type=SMS
Destination=021000001
Notify=1 day
Message=Hi John, this is a reminder
of your appointment at 3pm on 17th March.
Reply NO to cancel. Auckland Consulting
- Type: The "Type" field may be 'SMS', 'Email' or 'Voice'.
- Destination: The mobile number, telephone number or email address.
- Group: Instead of using 'Destination' to send to an individual, you can instead use 'Group' to send a broadcast to a group of TNZ Dashboard Address Book contacts. The syntax is "Group=[Group_Code]".
- Notify: Defines how long before the event's Start Date the reminder should be sent. Allowed values are 'On Time', '0 Minutes', '30 Minutes', '1 Hour', '2 Hours', '3 Hours', '6 Hours', '12 Hours', ' 24 Hours', '1 Day', '2 Days', '1 Week', '1 Month'. If an invalid time is specified, the calendar will use its default.
- Message: The reminder message to be sent. This field should not have any line breaks or semi-colons.
Any unspecified fields will use your Calendar's defaults. For example, if you don't specify 'Message', it will use your Calendar's "Default Reminder Message."